The visual appeal of any project, presentation, or promotion cannot be overstated. From school projects to small business advertisements, eye-catching banners serve as powerful communicators, drawing attention and conveying messages effectively. While professional design software often comes with a steep learning curve and a hefty price tag, many overlook the capabilities of common applications. For those seeking an accessible and familiar tool, Microsoft Word 2010 offers a surprisingly robust platform for basic graphic design. Understanding how to leverage a Banner Template Word 2010 can unlock a world of creative possibilities without requiring specialized skills or expensive subscriptions.
Word 2010, a staple in countless offices and homes, provides a user-friendly interface that many are already comfortable navigating. This familiarity significantly reduces the barrier to entry for design tasks, making it an ideal choice for quick projects or when resources are limited. Instead of grappling with complex layers and vectors, users can focus on content and aesthetics using tools they already know. The ability to integrate text, images, and shapes seamlessly within a document environment streamlines the design process for banners of various purposes.

Creating a banner from scratch can be daunting, even in a familiar program. This is where the power of templates truly shines. A well-designed template provides a foundational structure, pre-set dimensions, and often some initial design elements, allowing users to jump directly into customization rather than spending valuable time on setup. This efficiency is particularly beneficial for individuals and small businesses who need professional-looking results on a tight schedule.

This comprehensive guide will walk you through the entire process, from understanding the advantages of using Word 2010 for banners to finding, customizing, and perfecting your design with a dedicated Banner Template Word 2010. We'll delve into practical steps, offer advanced tips, and help you produce stunning visuals that make a lasting impression, all within the comfortable confines of Microsoft Word.

Why Choose Word 2010 for Your Banner Design Needs?
Microsoft Word 2010 might not be the first program that comes to mind for graphic design, but its widespread availability and intuitive interface make it an excellent choice for creating basic to moderately complex banners. The primary advantages lie in its accessibility, cost-effectiveness, and ease of use, which democratize design for everyone.

Firstly, accessibility is paramount. Chances are, if you're reading this, you already have Microsoft Word 2010 installed on your computer. This eliminates the need to purchase or learn new, often expensive, software like Adobe Photoshop or Illustrator. For individuals, students, or small businesses with budget constraints, this is a significant benefit. You can immediately begin designing without any additional investment.

Secondly, the familiarity of Word's interface greatly reduces the learning curve. Most users are accustomed to inserting text, images, and shapes, as well as formatting options within Word. This pre-existing knowledge can be directly applied to banner design, allowing you to focus more on creative expression and less on figuring out software mechanics. Tools like text boxes, shapes, and picture formatting options are readily available and function much as they do in typical document creation.

Finally, Word 2010 offers surprising versatility for banner design. While it lacks advanced graphic design features, it provides ample functionality for creating visually appealing banners for various purposes. You can manipulate text with a wide array of fonts and styles, insert and edit images, draw custom shapes, and even layer elements to achieve a desired effect. For event announcements, sales promotions, party decorations, or even simple website headers, Word 2010 provides a powerful enough toolkit to achieve professional-looking results without the complexity.

Unearthing and Utilizing a Banner Template Word 2010
The quickest way to kickstart your banner design in Word 2010 is by leveraging a template. Templates provide a pre-formatted canvas, often with suggested layouts, color schemes, and even placeholder text, saving you considerable time and effort. Finding the right Banner Template Word 2010 is the first step towards an efficient design process.

Discovering Built-in and Online Templates
Word 2010 comes with a feature to access templates directly from Microsoft Office Online. When you open Word, go to File > New. In the "Available Templates" section, you'll see options for "Office.com Templates." You can use the search bar to look for "banners," "flyers," or "posters" which can often be adapted into banners. Microsoft continually updates its online template library, providing a diverse range of starting points.

Alternatively, numerous third-party websites offer free and premium Word templates. A simple Google search for "free banner templates for Word 2010" will yield many results. When downloading from external sources, always ensure the website is reputable to avoid malware. Once downloaded, these templates are typically .dotx or .docx files that you can open directly in Word.
Starting with a Blank Document: A Custom "Template"
If you can't find a template that perfectly suits your needs, or if you prefer more control from the outset, you can effectively create your own "template" by setting up a blank document.

- Set Page Size and Orientation: Go to Page Layout > Size > More Paper Sizes. Here, you can define custom width and height for your banner. Consider whether your banner will be portrait or landscape and adjust the Orientation accordingly (also under Page Layout). For a standard long banner, you might set a width of 36 inches and a height of 10 inches, for example.
- Adjust Margins: Set your margins to zero (or minimal) by going to Page Layout > Margins > Custom Margins and setting all values to 0. This maximizes your design space. Word might warn you about margins being outside the printable area; you can usually ignore this for design purposes, especially if you plan to export to PDF or an image.
- Use a Drawing Canvas: For complex layouts with many shapes and images, consider inserting a Drawing Canvas (Insert > Shapes > New Drawing Canvas). This acts as a container for your graphic elements, making them easier to move and resize as a group.
Saving this setup as a new document (File > Save As) and then as a Word Template (.dotx) will allow you to reuse your custom settings repeatedly, essentially creating your own Banner Template Word 2010.

Customizing Your Banner Template in Word 2010: The Design Process
Once you have opened a Banner Template Word 2010 or set up your blank canvas, the real creative work begins. Customization involves a strategic blend of text, images, shapes, and colors to convey your message effectively and aesthetically.

Mastering Text Elements
Text is often the backbone of any banner. Word 2010 offers extensive options for text manipulation:

- Fonts: Choose fonts that are legible and appropriate for your banner's purpose and target audience. For headings, use bolder, larger fonts; for smaller details, select clear, sans-serif options.
- Size and Color: Adjust text size to ensure visibility from a distance. Use contrasting colors between text and background for maximum readability.
- WordArt: For impactful titles, use WordArt (Insert > WordArt). It allows you to apply various styles, shadows, reflections, and 3D effects to text, making it stand out.
- Text Boxes: Instead of typing directly onto the page, use text boxes (Insert > Text Box > Draw Text Box). Text boxes offer greater flexibility in positioning and layering text over other elements like images or shapes. You can also easily rotate them.
Integrating and Enhancing Images
Images can significantly boost the visual appeal of your banner.

- Inserting Images: Go to Insert > Picture and select your desired image.
- Positioning and Wrapping: Once an image is inserted, right-click it and choose Wrap Text > In Front of Text or Behind Text for maximum flexibility in moving and layering.
- Picture Tools: Use the Picture Tools Format tab that appears when an image is selected. Here, you can crop, resize, adjust brightness and contrast, apply artistic effects, or even remove the background (for simple backgrounds). Ensure your images are high-resolution to avoid pixelation, especially if the banner will be printed large.
Utilizing Shapes and Lines
Shapes and lines add structure, flair, and can effectively highlight elements.
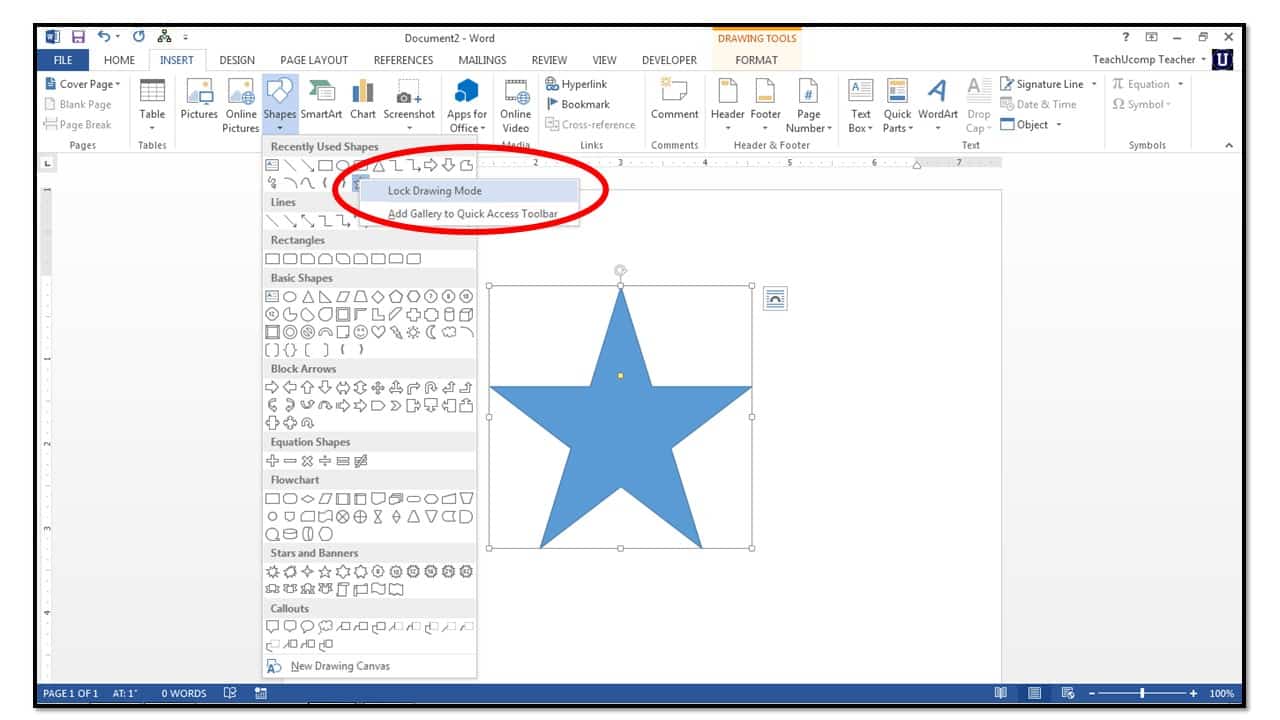
- Inserting Shapes: From Insert > Shapes, you can choose from rectangles, circles, arrows, stars, banners, and callouts.
- Formatting Shapes: Select a shape and use the Drawing Tools Format tab. You can change fill colors, outline colors and weights, add shadows, reflections, and even gradients.
- Borders and Dividers: Use rectangles to create borders or lines to act as dividers between sections. Arrows can guide the viewer's eye.
Backgrounds and Color Schemes
The background sets the overall mood. You can set a solid background color by inserting a large rectangle shape behind all other elements and sending it to the back. Alternatively, insert a full-page image as the background. Maintain a consistent color scheme throughout your banner that aligns with your brand or event theme. Use the color palette to ensure harmony among all your design elements.

Advanced Tips for a Professional-Looking Banner in Word 2010
While Word 2010 has its limitations, several advanced techniques can elevate your banner designs from amateur to near-professional quality. Applying these tips can add polish and sophistication to your finished product, especially when using a Banner Template Word 2010.

Employing the Drawing Canvas for Complex Layouts
As mentioned earlier, the Drawing Canvas (Insert > Shapes > New Drawing Canvas) is a powerful tool. It acts as a contained environment for multiple shapes, text boxes, and images. When you move the drawing canvas, all elements within it move together, making it easier to arrange complex layouts without individual objects getting separated or misaligned. This is particularly useful for intricate banner designs where precision is key.

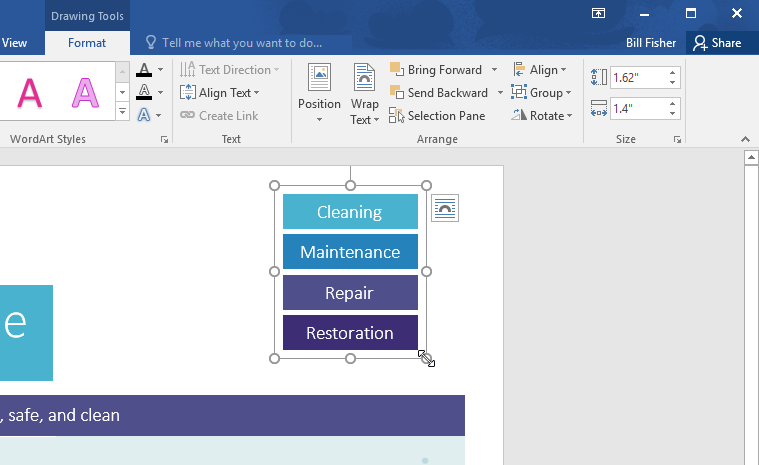
Grouping Objects for Easier Manipulation
Once you have arranged several individual elements (text boxes, shapes, images) into a desired configuration, you can group them together. To do this, hold down the Ctrl key and click on each object you want to group. Then, right-click on one of the selected objects and choose Group > Group. This transforms multiple individual elements into a single, cohesive object that can be moved, resized, or rotated as one unit, simplifying the editing process considerably.
Using Alignment and Distribution Tools
Achieving perfect alignment is crucial for a professional look. Word 2010 provides tools to help:
- Align: Select multiple objects, then go to Drawing Tools Format > Align. Options like "Align Left," "Align Center," "Align Middle," etc., will help you line up your elements precisely.
- Distribute: If you have several objects you want to space evenly, select them, then use Distribute Horizontally or Distribute Vertically from the Align menu. This ensures balanced spacing and a clean layout.
Leveraging the Selection Pane
For banners with many overlapping elements, the Selection Pane (Home > Editing > Select > Selection Pane) is incredibly helpful. It lists all objects on your page by name. You can select specific objects from the list, rearrange their stacking order (bring forward/send backward), and even hide objects temporarily to work on underlying layers. This level of control is invaluable for fine-tuning complex designs.
Incorporating Visual Hierarchy
Think about what information is most important. Use size, color, and placement to create a visual hierarchy. The most critical message should be the largest, boldest, or centrally placed, guiding the viewer's eye through the banner in a logical flow. This is a fundamental principle in graphic design and applies equally to designs made with a Banner Template Word 2010.
Saving Custom Colors and Styles
If you're adhering to specific brand colors, you can define and save custom colors in Word. When selecting a color, choose More Colors to input RGB or HSL values. You can also create and save custom styles for text (Home > Styles > Create a Style) to ensure consistency across multiple text elements on your banner.
Practical Applications and Examples for Your Banner Template Word 2010 Designs
The versatility of a Banner Template Word 2010 extends to a wide array of practical applications. Understanding these different uses can inspire your next project and demonstrate the program's surprising utility beyond standard document creation.
Event Promotion Banners
One of the most common uses for Word-designed banners is event promotion. Whether it's a birthday party, a community fair, a school bake sale, or a local business grand opening, a visually appealing banner can effectively draw attention. You can create banners for:
- Celebrations: "Happy Birthday," "Congratulations Graduates," "Wedding Shower."
- Sales & Offers: "50% Off Sale," "Limited Time Offer," "New Arrivals."
- Community Events: "Annual Town Fair," "Charity Run," "School Play."
For these, focus on clear, large text, relevant imagery, and easily identifiable dates/times/locations.
Educational Displays and Posters
Teachers and students can benefit greatly from using Word 2010 to create informative and engaging educational banners. These can be used for:
- Classroom Decorations: Alphabet charts, historical timelines, scientific process diagrams.
- Project Presentations: Visual aids for science fairs, book reports, or research summaries.
- Informational Displays: Explaining complex concepts with text, diagrams, and images.
The ability to combine text and graphics seamlessly makes Word an excellent tool for these purposes.
Business and Organizational Signage
Small businesses and organizations can create professional-looking internal or external signage without incurring significant design costs. Examples include:
- "Open/Closed" signs: Customizable with business hours.
- Directional signs: Guiding visitors within a venue or office.
- Internal announcements: New policies, team achievements, safety notices.
- Temporary promotional banners: For in-store promotions or pop-up events.
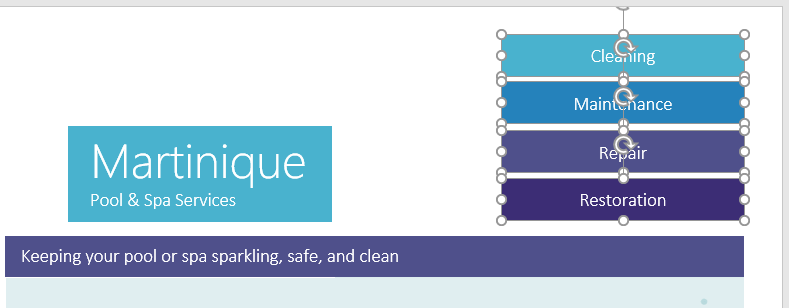
A consistent Banner Template Word 2010 can help maintain brand identity across various signs.
Digital Banners and Social Media Graphics
While primarily designed for print, Word 2010 banners can be adapted for digital use. By saving your banner as a PDF and then converting it to an image file (PNG or JPG) using an online converter, you can create:
- Website Banners/Headers: For personal blogs or small business websites.
- Social Media Cover Photos: For Facebook, LinkedIn, or event pages (ensure correct dimensions).
- Email Signature Banners: Adding a visual flair to your email communications.
Remember to consider the pixel dimensions required for digital platforms when setting up your page size in Word.
Saving, Printing, and Exporting Your Word 2010 Banner
Once your banner design is complete, the final crucial steps involve saving your work, preparing it for print, or exporting it for digital use. Each option has specific considerations to ensure your Banner Template Word 2010 creation looks its best.
Saving Your Document
- Standard Save (.docx): Always save your work regularly as a standard Word Document (
.docx). This preserves all your layers, text boxes, and formatting, allowing you to easily make future edits. Go to File > Save As and choose "Word Document." - Saving as a Template (.dotx): If you've created a custom layout you'd like to reuse, save it as a Word Template (
.dotx). This creates a new, untitled document based on your template each time you open it, ensuring your original template remains untouched. Choose "Word Template" from the "Save as type" dropdown.
Printing Your Banner
Printing banners from Word 2010 requires attention to page setup, especially for large formats.
- Page Setup Verification: Double-check your page size and orientation (Page Layout tab) to match the intended print output.
- Print Preview: Always use File > Print > Print Preview to see how your banner will look on paper. This helps catch potential issues like cut-off elements or incorrect scaling.
- Printer Settings:
- Paper Size: If printing on a large format printer, ensure the correct custom paper size is selected in your printer's preferences.
- Tiling for Large Banners: For banners larger than your home printer can handle, you'll need to print it in sections ("tiles") that you can then tape together. Some printers have a "poster" or "tiling" option in their print settings that will automatically split a large document across multiple pages. If not, you might need to manually divide your design or export to PDF and use a PDF reader's poster print function.
- Quality: Select the highest print quality setting available for your printer to ensure crisp images and text.
- Borderless Printing: If your printer supports it, choose borderless printing to maximize your design area and avoid white margins around your banner sections.
Exporting Your Banner for Professional Printing or Digital Use
For professional printing services or digital applications, exporting your Word document to a more suitable format is often necessary.
- Save as PDF: The most recommended method for professional printing is to save your banner as a PDF. Word 2010 includes a built-in "Save as PDF" option (File > Save As, then choose "PDF" from the "Save as type" dropdown). PDFs preserve your layout, fonts, and image quality, making them ideal for commercial printers.
- Convert PDF to Image: To use your banner digitally (e.g., on a website or social media), you'll need an image file (JPEG or PNG).
- Online Converters: Upload your PDF to a free online PDF to JPG/PNG converter.
- Screenshot: For quick, low-resolution digital use, you can zoom in on your banner in Word and take a screenshot using the Snipping Tool (Windows) or a similar utility. This is generally not suitable for print or high-quality digital display.
- "Save as Picture" (for individual elements): While Word doesn't save the entire document as a picture, you can right-click individual shapes, text boxes, or grouped objects and choose "Save as Picture" to extract elements as standalone images.
Always communicate with your professional printer about their preferred file formats and specifications (e.g., bleed, resolution) to ensure the best possible outcome for your Banner Template Word 2010 design.
Troubleshooting Common Issues with Your Banner Template Word 2010
Even with a well-designed Banner Template Word 2010, you might encounter a few common hiccups during the design, saving, or printing process. Knowing how to troubleshoot these issues can save you time and frustration.
Image Quality and Resolution Problems
- Pixelation: If your images look blurry or pixelated, especially after resizing, it's likely due to low resolution. Always start with high-resolution images. If you enlarge a small image, it will lose quality.
- Word's Compression: Word sometimes compresses images to reduce file size. To prevent this, go to File > Options > Advanced, scroll to "Image Size and Quality," and ensure "Do not compress images in file" is checked. You can also set the default target output to "High fidelity."
- Print vs. Screen: Images might look fine on your screen but appear poor when printed. This is often a resolution mismatch. Aim for images with at least 150-300 DPI (dots per inch) for good print quality.
Text Overlap and Layout Shifts
- Wrapping Issues: If text is overlapping images or shapes unexpectedly, check the "Wrap Text" settings for the offending objects (right-click > Wrap Text). "In Front of Text" or "Behind Text" generally offer the most control for design elements.
- Object Anchoring: Objects in Word are often anchored to specific paragraphs. If your layout shifts when you add or delete text, right-click the object, go to "More Layout Options," and under the "Position" tab, try unchecking "Move object with text."
- Text Box vs. Direct Text: Always use text boxes for banner content. They provide much greater control over positioning and layering compared to typing directly onto the page.
Printing Errors and Scaling Issues
- Cut-off Elements: If parts of your banner are cut off during printing, verify your page size in Word matches the paper size selected in your printer's settings. Also, ensure your design elements are within the printable margins.
- Incorrect Scaling: If the banner prints at the wrong size, check the scaling options in your printer's preferences. Sometimes, Word or the printer driver might try to "fit to page," which can distort your design. Select "Actual Size" or "100% scale" if available.
- Large File Size: Banners with many high-resolution images can result in very large Word files. This can slow down performance and make printing difficult. Consider compressing images (File > Compress Pictures) if absolutely necessary, but be mindful of the impact on quality. Exporting to PDF often handles large files more efficiently.
Version Compatibility
- Opening in Older Versions: If you create a banner in Word 2010 and open it in an older version (e.g., Word 2007), formatting might shift or features might not be supported. Always save as a
.docxfile, and if sharing with someone using an older version, consider saving a compatible version (File > Save As > Word 97-2003 Document) or, better yet, sharing as a PDF.
By being aware of these common issues and their solutions, you can efficiently troubleshoot problems and ensure your Banner Template Word 2010 projects come to life exactly as you envisioned them.
Conclusion
Creating visually appealing banners doesn't require expensive software or specialized design degrees. As we've explored, Microsoft Word 2010, a familiar and accessible tool for many, offers a surprisingly robust platform for producing effective and attractive banners for a myriad of purposes. By understanding its capabilities, from basic text and image manipulation to more advanced layout techniques, anyone can transform a simple document into a compelling visual statement.
The key to efficiency and a professional finish often lies in leveraging a Banner Template Word 2010. These pre-designed structures provide a head start, allowing you to focus your creative energy on customizing content, colors, and imagery to perfectly align with your message or brand. Whether you choose a built-in template, download one online, or create your own custom setup, the foundational elements empower you to achieve great results.
From event promotions and educational displays to small business signage and even digital graphics, the applications of a Word-designed banner are extensive. With careful attention to detail, strategic use of Word's design tools, and an understanding of best practices for saving and printing, your creations can rival those made with more complex software. Embrace the power of your existing tools, experiment with different designs, and empower yourself to communicate visually and effectively with stunning banners crafted right in Microsoft Word 2010.
0 Response to "Create Stunning Banners Banner Template Word 2010"
Posting Komentar